Developing extensions for Firefox for Android
Learn more about developing extensions for Firefox for Android
Learn more about developing extensions for Firefox for Android
You approach the coding of an extension for Firefox for Android in the same way as you would for a desktop extension; using a text editor or tool of your choice to write the code. However, when you want to test and debug your extension you need to follow a different process, this article walks you through that process.
Complete some one-off setup tasks on your computer and Android device.
On your development computer:
PATH.On your device or Android emulator:
You receive a warning if the versions of Firefox on your computer and Android device are different. Generally, this isn't an issue. However, if you encounter issues, make sure your versions are the same.
For more information, see Connecting to a remote device in the Firefox Source Docs. To connect over Wi-Fi, see Connecting to Android over Wi-Fi.
Then, on your development computer:
adb devicesList of devices attached
51800F220F01564 deviceBefore running your extension on Firefox for Android, consider using web-ext lint. Lint performs a check to determine if any of the permissions, manifest keys, and web extension APIs you're using are incompatible with Firefox for Android. Lint relies on your extension's manifest.json file including strict_min_version values for the optional gecko and gecko_android sub-keys in browser_specific_settings. It then reports on the features that are not supported by the minimum version you have set.
In the lint report:
PERMISSION_FIREFOX_ANDROID_UNSUPPORTED_BY_MIN_VERSION,KEY_FIREFOX_ANDROID_UNSUPPORTED_BY_MIN_VERSION, andANDROID_INCOMPATIBLE_APIsimilar to this:
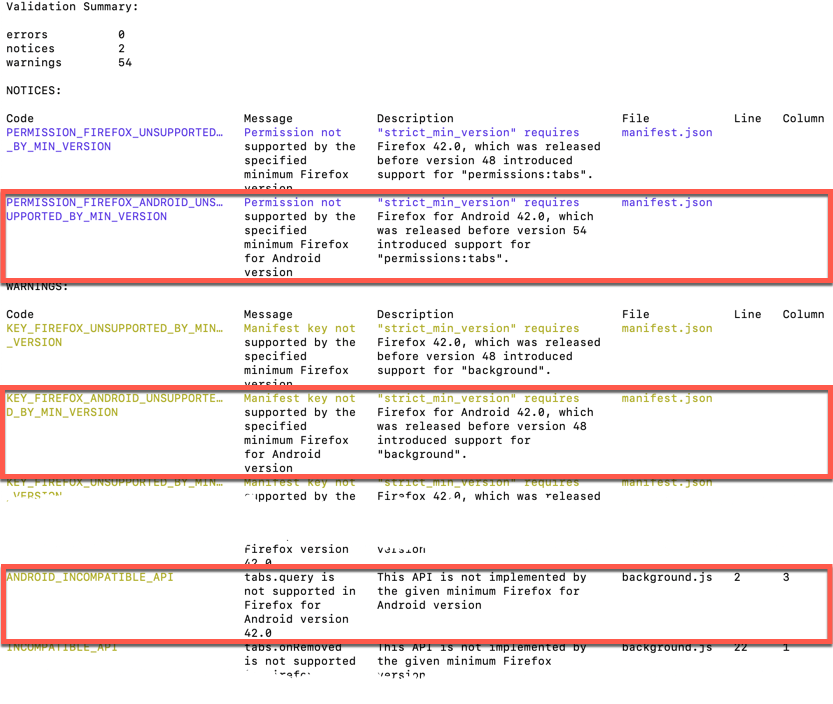
Lint does not report on APIs that are not implemented by Firefox or Firefox for Android.
When setting strict_min_version values in browser_specific_settings, unless you're targeting a specific version of Firefox, choose the most recent version of Firefox you expect your extension to be compatible with. Due to Android's different APIs and form factors (compared to desktop Firefox), set gecko_android after explicitly verifying compatibility. This sub-key enables a compatibility range that is distinct from Firefox for desktop.
"browser_specific_settings": {
  "gecko": {
    "strict_min_version": "102.0"
  },
  "gecko_android": {
    "strict_min_version": "113.0"
  }
}Before making your extension available, test it on Android to ensure it works as expected. When you publish it on AMO, reviewers may reject it or request changes if it doesn't meet basic usability requirements.
If you haven't used web-ext lint, check Browser Support for JavaScript APIs to verify that the APIs your extension uses are available on Firefox for Android.
Make sure HTML pages have viewport meta tags to scale your extension's UI on mobile screens properly.
Use responsive design patterns to ensure that your UI meets the expectations of Android users.
Go through all of your extension's critical paths on an Android device to ensure they work as expected.
Make sure the extension works well without an internet connection, as connectivity can be unreliable on mobile devices.
Test your extension on a variety of device types and sizes. Android Studio's virtual devices can help.
These instructions are for temporarily loading an extension. Instructions for persistent loading of extensions in Firefox for Android Nightly or Beta can be found on this blog post.
In the unzipped directory of your extension, run web-ext run -t firefox-android. Follow the instructions to select the correct device and the apkname as:
org.mozilla.fenix for Nightlyorg.mozilla.firefox_beta for Beta.org.mozilla.firefox for the release edition.Here is an example of the command:
web-ext run -t firefox-android --adb-device XXX --firefox-apk org.mozilla.fenixThe add-on is loaded in the main browser profile instead of a new temporary profile directory.
You cannot inspect the markup of Fenix's browserAction popups using the Firefox Developer Tools Inspector (see bug 1637616). As a workaround, temporarily change the extension to open the popup extension page into a tab to inspect it.
You can debug your extension in the web developer tools and view any manifest.json validation messages using adb logcat. First set up Firefox remote debugging.
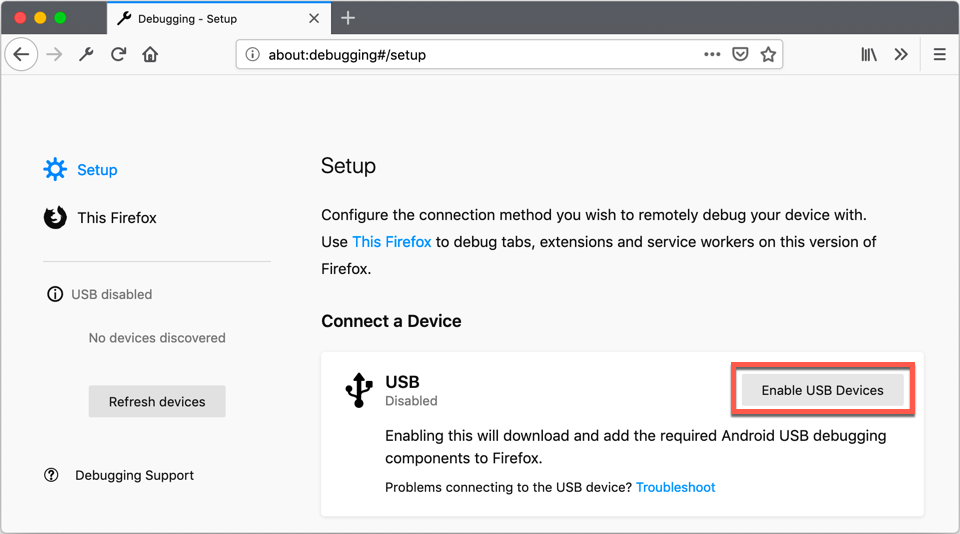
With your device connected over USB or Wi-Fi, open about:debugging and enable the device connection.
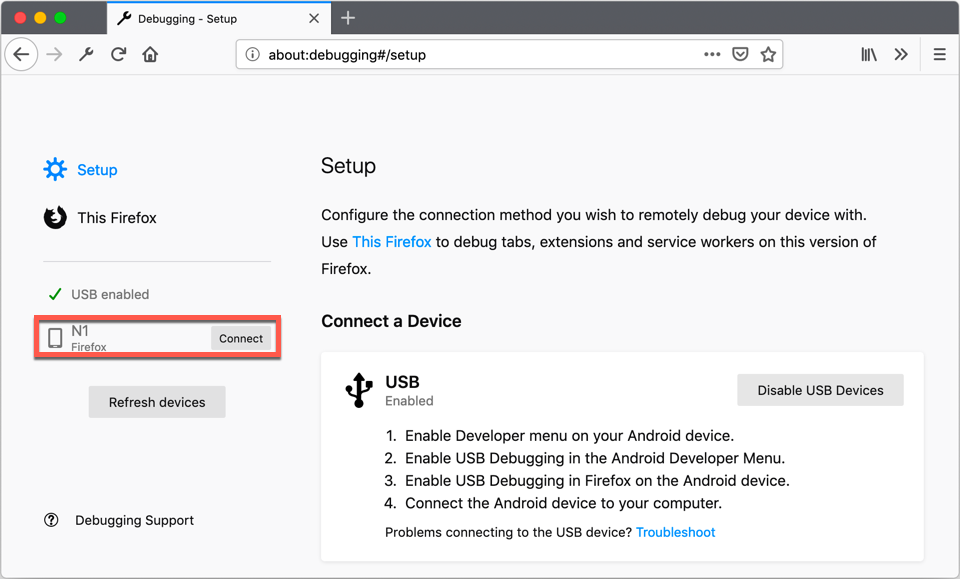
Your device is listed in the left-hand column, click Connect.
If prompted, allow the incoming connection on your Android device. Now start your extension on the Android device using web-ext run. You will need to have at least one tab opened in order for your extension to load. Click your device in the left-hand column and scroll down to find Processes in the list of active features in the browser.
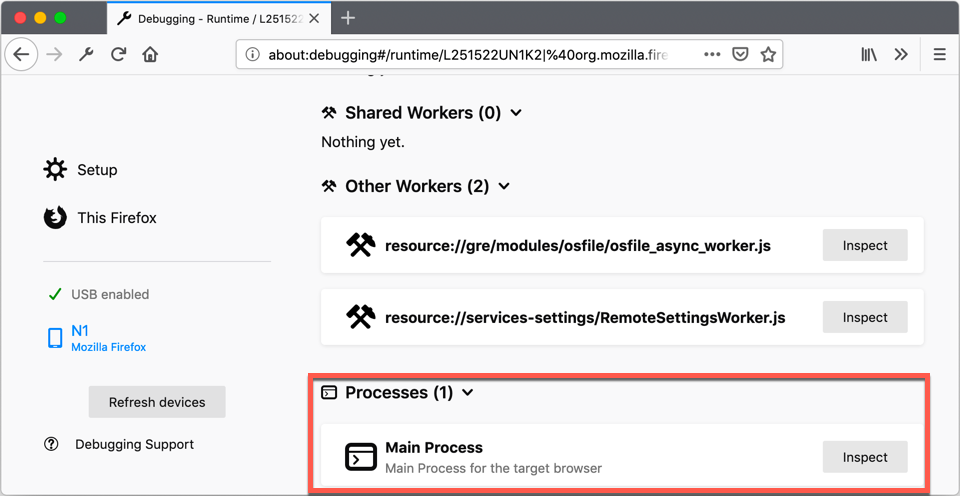
Click Inspect next to Main Process. The web developer toolbox displays in Debugger.
For much of the debugging work, it's useful to be able to view Console with Inspector or Debugger. You do this using the split console, press esc to activate this mode.
Load a page in which your extension exercises. Now you can access any of the JavaScript in your extension.
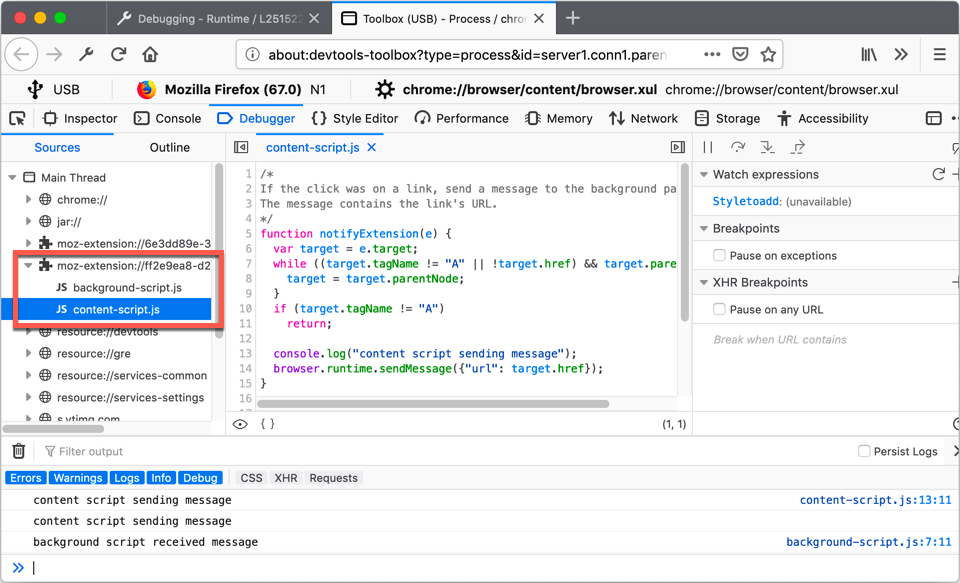
Content scripts can be reached and debugged when connected to the main process or to a tab target where a content script is running.
In the Debugger you can set breakpoints, step through code, modify the extension's state, and do everything else you'd expect to be able to do in a debugger. Any messages logged by your code display in Console.
To inspect the popup's HTML and CSS, use Inspector. First, click the page select icon ( ) to open the HTML document you want to inspect. You can review and modify the document's HTML and CSS in Inspector, as you would with any webpage.
For more details on using the web developer tools, see Firefox Developer Tools.
In addition to the messages from your code, the console may also include messages about the validation of the extension's manifest.json files. These messages can be viewed using the adb logcat command. To avoid receiving other unrelated messages, you can pipe the output through grep, filtering by the extension's ID. For example:
/path/to/adb logcat | grep @your-addon-idThis will give output similar to this:
I/Gecko (30440): 1496056181889 addons.xpi WARN Addon with ID @your-addon-id already installed, older version will be disabledIf your add-on fails to run, check these messages as they may provide information explaining why.
Firefox for Android doesn't have full feature parity with the desktop version of Firefox. There are several known issues with Firefox for Android that can lead to a poor user experience. Therefore, it's recommended you use Manifest V2 for extensions targeting Firefox for Android.
| Issue description | Tracking bug |
|---|---|
| Background service workers aren't supported on Firefox for Android. Instead, use event pages. | Bug 1573659 |
Firefox for Android doesn't visually indicate when an extension has a pending "host_permissions" grant request for the user. |
Bug 1820867 |
| Users can't edit an extension's host permission grants in Add-ons Manager on Firefox for Android. | Bug 1812125 |
Develop
Develop
Develop